It thought I’d share a few photos from a recent shoot for a local home builder. This time, I want to focus on some of the unusual challenges I face and the techniques I use to overcome them.
Reflections
The lighting technique I use employes multiple camera flashes deployed throughout the scene. Often, these flashes are crammed into the strangest places in an effort to keep them out of the scene while allowing them to do their job and add light where it is needed. Many times, light from the flashes reflects off the glass on picture frames, stainless steel appliances, mirrors, and any number of shiny objects. A trial and error approach involving the moving of the lights and the reflective objects often accounts for the bulk of the time spent on any scene.
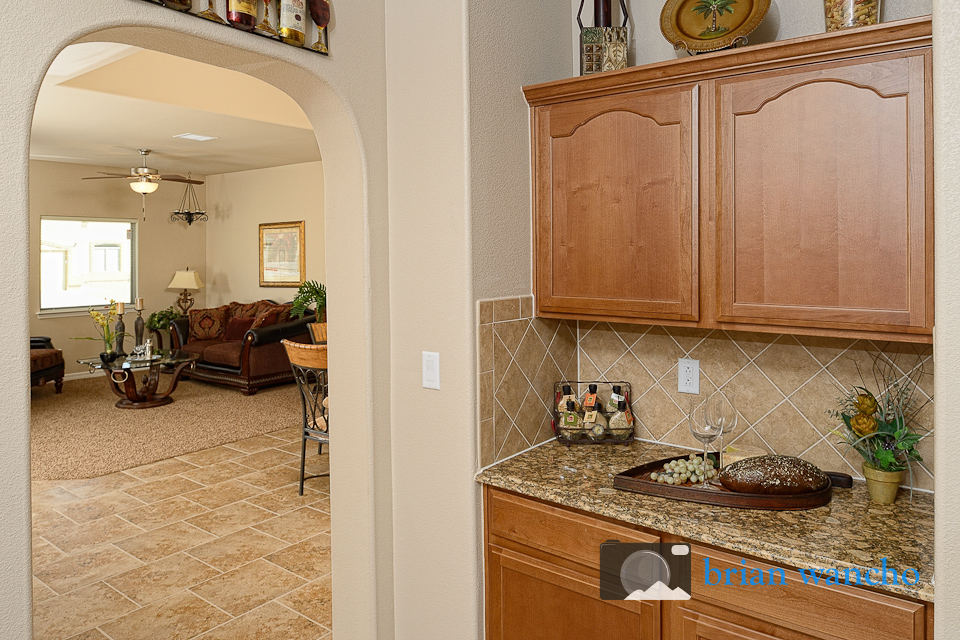
In the photo below, however, I was faced with an unusual issue. After I got all the lighting to work how I wanted in this moderately complex scene, I took my usual gray-card shot and began to move the equipment to the next setting. As I was reviewing the shot I noticed a bright area on the picture frame glass in the distant living area. As I zoomed in to the spot I saw it – a portable toilet. Because this is a model home in a new construction area, this is a very likely situation. Portable toilets, cement trucks, and construction workers all have ways of working their way into the images.
 The solution in this case was to use one of my reflector cases to change the angle of the picture frame just enough so that the reflection is no longer an issue. I simply folded up the nylon case and placed it behind the picture frame until the camera could no longer see the reflection.
Perspective Control
I’ve been experimenting with the shift features available on the Nikkor 24mm f/3.5 PC-E lens. This lens allows me to shift the body of the lens relative to the camera sensor in order to see a different portion of the image circle.
One guideline in interior photography is that the camera height should usually be about the same height as the light switches. Generally, this will produce a photo that has a good balance of floor and ceiling. In kitchens, however, the guideline is to put the camera high enough so that you can’t see the underside of the upper cabinets. Sometimes this results in an image that has way too little floor and way too much ceiling.
A perspective control lens fixes this issue. This lens allows me to raise the camera high enough to hide the underside of the cabinets, and then shift it down to regain the floor lost through the extra height.
The effect is not very obvious unless you know what to look for. For example, the two sample images above were shot using this technique.
The house I shot recently provided a good opportunity to take some sample shots to show how the shift lens allows the high perspective to be maintained while regaining vertical composition that is desired.
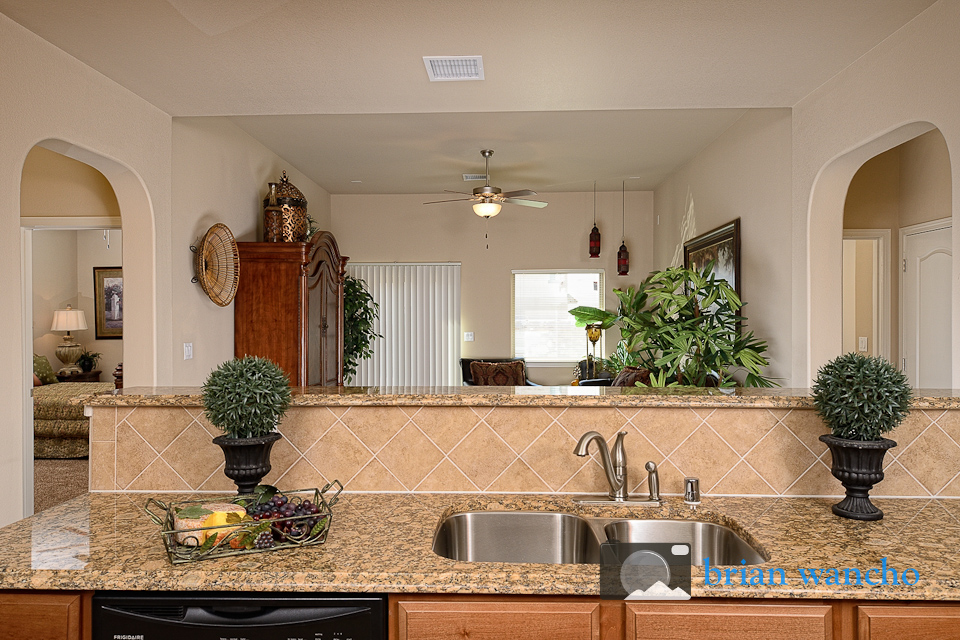
The first image shows what the scene looks like without any shift or camera height adjustments. My goal with this composition was to capture both the kitchen elements in the foreground and the furniture elements in the room beyond the kitchen. At this height, it isn’t working. The room beyond the countertop is obscured.
The easy solution is to raise the height of the camera to look over the countertop.
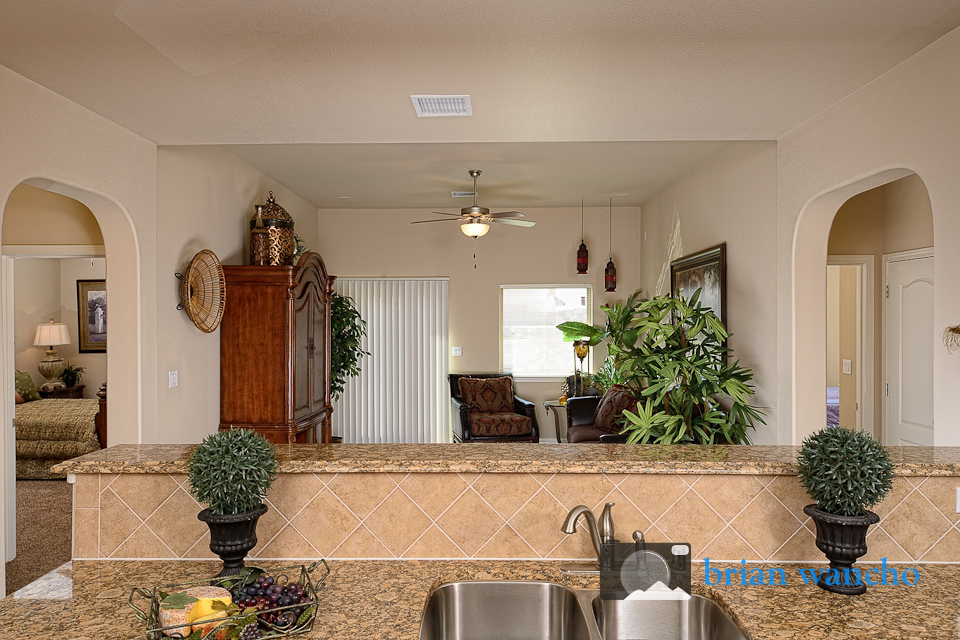
This height produces a better scene, but now about 25% of the image is ceiling and we’ve lost the view of the kitchen cabinets and dishwasher while cutting right through the sink.
Keeping the camera at the same height, but shifting the lens downward produces the image below.
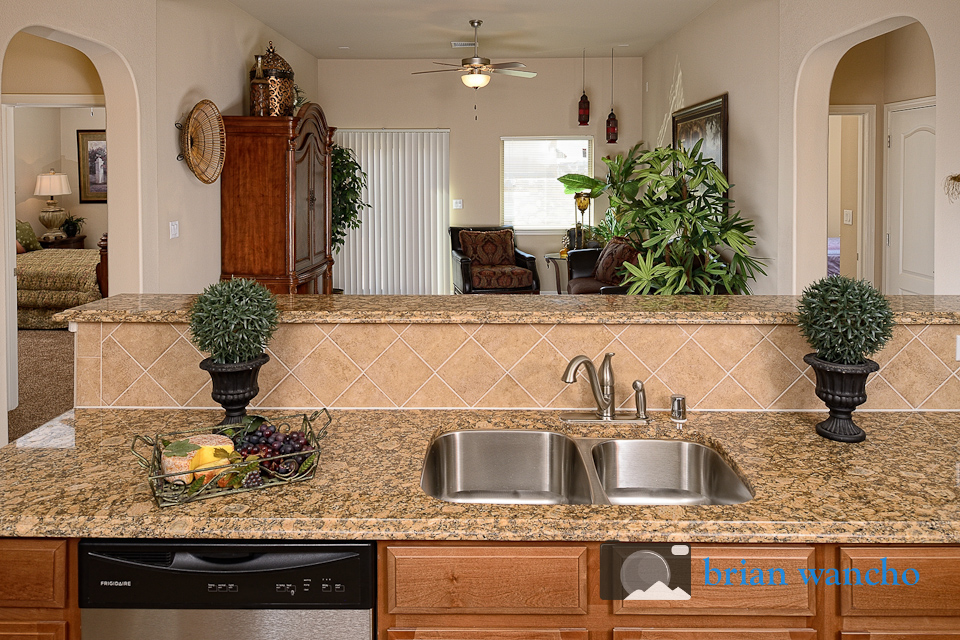
This technique maintains the high perspective of the elevated camera while capturing more of the lower portion of the scene without wasting so much of the image on empty ceiling space.